Host CRL and AIA for your internal PKI in Microsoft Azure Web App

When you have an internal PKI solution you have to consider where to host your CRL and AIA. They are both important  and must be available for the client when your internal certificates are in use. By default (but you should never use default settings in PKI) the files are stored in the CA server and available through SMB and HTTP (and LDAP if domain joined). Not only do you have to make your CA server available through these ports but if your clients are outside the company network then your CA must be available there as well. Needless to day, this is not a good practice.

Normally you would publish CRL and AIA on a webserver in your DMZ, make it redundant and such, but if you’re going through all that work you might as well use the opportunity to take it all the way to the cloud. Microsoft Azure can provide cheap (or even free) website where the CRL and AIA can be published and it will be globally available and redundant.

If you are new to Microsoft Azure then this is a very good opportunity to take the first step and learn the basics about it. Although the CRL and AIA are important, this solution is easy to implement and you get to learn the basics of Azure as you go.

Set up Azure web app

You need to register an account in Microsoft Azure first and there create a new Resource Group with a logical name. Inside the resource group I suggest you first make an App service Plan before you create the web app itself.

Under “App service plan/Location” you can choose to set up the pricing and location (which azure data center) you want to store the website. In this example I chose an existing app service plan. After the website is created you can create additional App service plans and later just assign your websites to these.

azure_new_website

Pricing and features

In “App services” you can add “App service plan” and select another pricing tier. Notice you get a brief summary of features available along with a rough price estimation pr month. For the CRL and AIA you won’t need a lot of processing power, storage space or deployment slots. If you want to use your custom domain name then “D1 Shared” is the minimum pricing tier. It is not available in the free tier. Without custom domain name your URL for CRL and AIA will be “(yourwebsitename).azurewebsites.net” which will work perfectly but you can’t bring that domain name with you if you want to host your CRL and AIA somewhere else at a later time. In that case you have to renew all CA certs, and their issued certs with updated URL to the CRL and AIA or stick with Azure web app. So I recommend using your own domain name for the flexibility it provides.

azure_web_pricing

When you have the proper pricing tier selected you can register your custom domain with the app service. Select “Custom domain” on the left side when you are in the web app and follow the instructions there.

Double escaping

The delta CRL has a ‘+’ in the end of the filename s in order for this to work you have to enable double escaping on the website or the delta CRL will be unavailable. There are no settings for this in the GUI as I am aware of, but you can create a new text file named “web.config” (no .txt extension)  with the following content and upload it to the root of the web app (site/wwwroot).

<?xml version=”1.0″ encoding=”utf-8″ ?>
<configuration>
<system.web>
</system.web>
<system.webServer>
<security>
<requestFiltering allowDoubleEscaping=’true’ />
</security>
</system.webServer>
</configuration>


Upload the files

There are many ways to upload both the cert-files and the web.config file up to the azure Web app and I won’t cover all the options here. If you go to “Properties” on the web app you will find all the information you need to upload files to the website in different ways. In “deployment options” you find options for source control and deployment. For my private PKI I picked a simple scheduled task which opens and FTP session and uploads the cert-files and web.config into /site/wwwroot in Azure using WinSCP which is my favorite FTP client.

Voila!

Thanks for reading everyone. Wish you all a happy new year
 

Getting started with MS Teams guest access

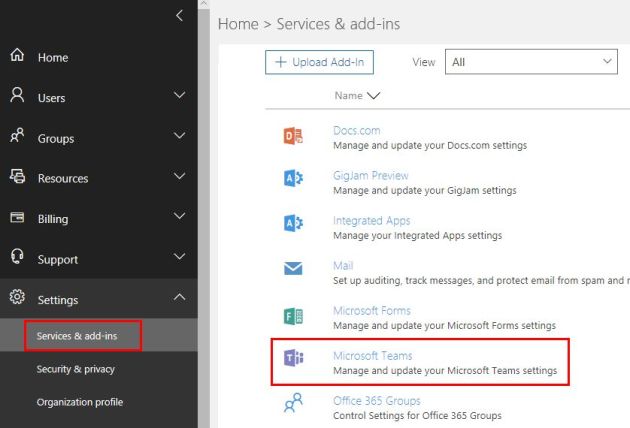
Finally guest access for Teams is RTM as you can read here and here.

I know pretty much every user in Ms Teams has been dying to start using this feature, but before you start inivting your external contacts en masse for all your teams and projects, there are a few things you should know.

  1. Read up on the feature with its capabilities and restrictions! No, really! Do it first! It’s the top sentence in this blog post for a reason.
  2. The guest user must reside in Azure AD, Microsoft account (MSA) is not supported yet
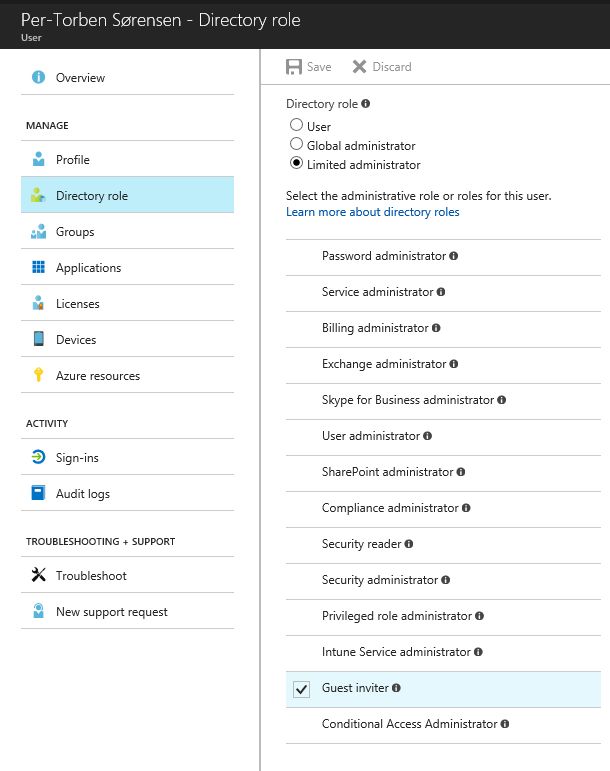
  3. Before you invite, you must at a minimum be a Limited admin in your Azure AD with “Guest inviter” role. Normal users can’t invite guests by default. Also the Team admin must allow you to invite guests.dfsfgeh2rwdf
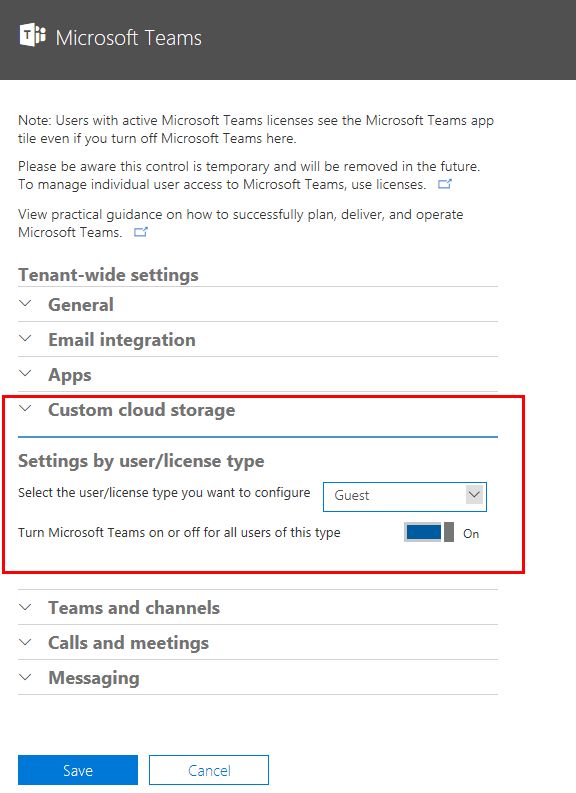
  4. You need to enable guest access in your tenant
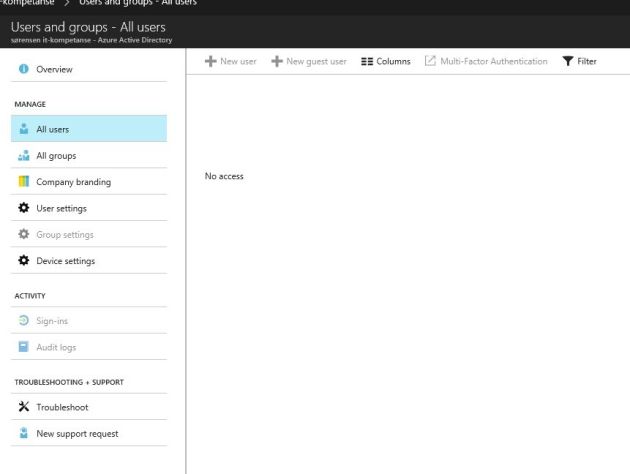
  5. The guest account can’t browse your Azure AD314ewdfsdfsg
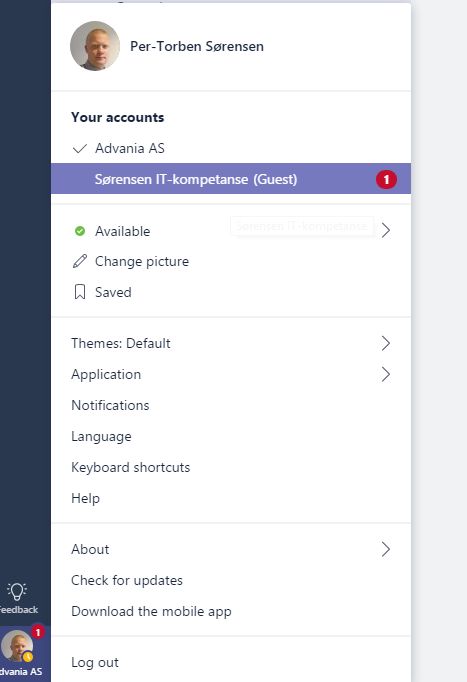
  6. In the Teams client you must manually select which tenant you want to access. Teams in other tenants won’t show up side by side with yours.sdf346tgff


That’s it, a nice and quick blog post this time. See you in a Team I hope 😉

Setting up Office 365 using Azure DNS

Do you use Azure DNS? Azure DNS provide hosting of your DNS zones in the Azure infrastructure meaning that not only do you get the fault-tolerance, audit logging and SLA (99.99%) but you can also manage your DNS zones using Powershell. I recommend you read about it on https://docs.microsoft.com/en-us/azure/dns/dns-overview including the FAQ and pricing information.

Implementing Office 365 requires a bit of DNS changes, and using Powershell this is very, very easy in Azure DNS. You need an account in Azure with admin-rights for Azure DNS, the name of the zone and the resource group it belongs to.

Change the input values to match the your environment and run this script from an editor (Powershell ISE or Visual Studio Code)

# This script automatically configures Azure DNS for O365
# Written by Per-Torben Sørensen (per-torben.sorensen@advania.no)
#
# Version: 1.0
#*********************************************************************************************
#
# Input values below
$azureadmin = “me@example.onmicrosoft.com” # admin user in azure portal with DNS rights
$ttl = “600” # TTL for all records (in seconds)
$zonename=”azure.contoso.com”
$rgname = “testazuredns” # Use Get-AzureRmDnsZone after login to find this
$proofvalue = “MS=ms12345678” # Proof of ownership from the Office 365 portal
#
#*********************************************************************************************
#
# Variables below
$cred = Get-Credential -Message “Log on” -UserName $azureadmin
$runscript = $false # Failsafe for accidental running
#*********************************************************************************************
if ($runscript -eq $false)
{
Write-Host -ForegroundColor Red “Do NOT run this script non-interactively! Run from editor”
return
}
# Log on Azure RM and set DNS variable
Login-AzureRmAccount -Credential $cred
$dnszone = Get-AzureRmDnsZone -Name $zonename -ResourceGroupName $rgname
#
# Creating first TXT record (Proof of domain ownership)
New-AzureRmDnsRecordSet -Zone $dnszone -Name “@” -RecordType TXT -Ttl $ttl -DnsRecords (New-AzureRmDnsRecordConfig -Value “$($proofvalue)”)
#
# Create CNAME records
New-AzureRmDnsRecordSet -Zone $dnszone -Name “autodiscover” -RecordType CNAME -Ttl $ttl -DnsRecords (New-AzureRmDnsRecordConfig -cname “autodiscover.outlook.com”)
New-AzureRmDnsRecordSet -Zone $dnszone -Name “sip” -RecordType CNAME -Ttl $ttl -DnsRecords (New-AzureRmDnsRecordConfig -cname “sipdir.online.lync.com”)
New-AzureRmDnsRecordSet -Zone $dnszone -Name “lyncdiscover” -RecordType CNAME -Ttl $ttl -DnsRecords (New-AzureRmDnsRecordConfig -cname “webdir.online.lync.com”)
New-AzureRmDnsRecordSet -Zone $dnszone -Name “msoid” -RecordType CNAME -Ttl $ttl -DnsRecords (New-AzureRmDnsRecordConfig -cname “clientconfig.microsoftonline-p.net”)
New-AzureRmDnsRecordSet -Zone $dnszone -Name “enterpriseregistration” -RecordType CNAME -Ttl $ttl -DnsRecords (New-AzureRmDnsRecordConfig -cname “enterpriseregistration.windows.net”)
New-AzureRmDnsRecordSet -Zone $dnszone -Name “enterpriseenrollment” -RecordType CNAME -Ttl $ttl -DnsRecords (New-AzureRmDnsRecordConfig -cname “enterpriseenrollment.manage.microsoft.com”)
#
# Modifies the existing TXT record
$txtrecord = Get-AzureRmDnsRecordSet -Zone $dnszone -Name “@” -RecordType TXT
Add-AzureRmDnsRecordConfig -RecordSet $txtrecord -Value “v=spf1 include:spf.protection.outlook.com -all”
Set-AzureRmDnsRecordSet -RecordSet $txtrecord
#
# Create SRV records
New-AzureRmDnsRecordSet -Zone $dnszone -Name “_sip._tls” -RecordType SRV -Ttl $ttl -DnsRecords (New-AzureRmDnsRecordConfig -Priority 100 -Weight 1 -Port 443 -Target sipdir.online.lync.com)
New-AzureRmDnsRecordSet -Zone $dnszone -Name “_sipfederationtls._tcp” -RecordType SRV -Ttl $ttl -DnsRecords (New-AzureRmDnsRecordConfig -Priority 100 -Weight 1 -Port 5061 -Target sipfed.online.lync.com)
#
# Set MX record – THIS CHANGES THE MAIL FLOW!
#
$exchadr = ($zonename -replace “\.”,”-“)
$exchadr +=”.mail.protection.outlook.com”
$mxrecords = @()
$mxrecords = New-AzureRmDnsRecordConfig -Exchange $exchadr -Preference 0
New-AzureRmDnsRecordSet -Zone $dnszone -Name “@” -RecordType MX -Ttl $ttl -DnsRecords $mxrecords
#
# This line allows you to select one or several DNS records and delete them from zone
Get-AzureRmDnsRecordSet -Zone $dnszone | Out-GridView -Title “Select record to delete” -OutputMode Multiple | Remove-AzureRmDnsRecordSet
#

RDGW access with Powershell

Hello everyone.

I’ve worked a bit with a redundant Remote desktop Gateway (RDGW) solution where we have 2 RDGW servers in NLB, providing a redundant access to various Remote Desktop collection. RDGW provides access without the need for VPN as it encapsulates RDP into HTTPS packets.

RDGW defines access through Client Access Policy (CAP) and Resource Access Policy (RAP). The CAP states the requirement (smart card/group membership) in order to connect through the RDGW. RAP states which resources internally are available to whom, based on group membership. RAP can provide access to either members of an AD group, members of a RDGW-defined computer group, or all resources on the network. So for a user to connect to a resource, we need both a CAP and RAP which both allows him/her access to use the RDGW and to access the resource respectively.

So when you have a redundant RDGW implementation with 2 or more RDGW servers, you need to make sure all servers have the same CAP and RAP configuration or you will have seemingly random connectivity issues for the end users. Once again Powershell saves the day.

The following script connects to each RDGW server specified and creates CAP and RAP and RDGW-computer group (if needed). It is still a work with progress with room for tuning and expanding, and as always copy with pride. The script is available here


File and DFS migration script

Currently I am in a project which will migrate several users in a large AD environment from one site to another as the current site is being decommissioned. This involves (among other things) migrating files and DFS Namespace to another file server and domain controllers and since this is a repetitive task for each department, I’ve made myself a sort of workbook in Powershell that I’d like to share with you.

This is a script which I load into an elevated PowerShell ISE, and change the input variables in the top and save a copy for each department. Then I can load the script I need, run all parameters and just mark and run selection (F8 hotkey) depending on the task at hand. The script is divided into 11 parts for tasks during preparation and during cut over. I’ve used comments to clearly divide the tasks.

To put it in perspective: The script linked will handle:

  • The department “Billing”
  • Short-reference “Bill”
  • Currently has a share named “Billing$” on the old file server
  • Linked to the DFS Namespace “\\corp.contoso.com\Bill” which is used for drive mapping.

The script will check and perform the different tasks needed to move their data to another file server and update both DFS Root Targets to the new domain controllers (which will host the namespace itself).and Folder Targets which points to the new file server.

The script can be downloaded here

Personally I found this makes it a lot easier, as the project goes on, to handle several ongoing migration jobs either in preparation or at cut over phase. It also makes sure the result is consistent and reduces the risk for failure.

As always feel free to use and customize to meet your own requirements

Automatically assign or revoke Office 365 licenses through AD group membership

Disclaimer: Your use of the script contained in this post is at your sole risk. All information is provided “as -is”, without any warranty, whether express or implied.

Recently a customer asked for a way to automatically assign and revoke licenses in Office 365 based on membership in a group in their local AD. It was a fun challenge so I wanted to share my solution with you. It mainly consist of a Powershell script which runs as a scheduled task, and the script compares the group membership with which users has the corresponding licenses and removes licenses from the users which is not a group member and adds the license if it is a member and doesn’t already have a license. The user account which runs the script must be able to query AD, assign licenses in the tenant and log on as a scheduled task on the server.

First challenge was the non-interactive logon to the tenant, where I also didn’t want the write the password in plain text. Now Powershell can store the password as an encrypted string in a text file and call upon that for logging in. Its encryption key is directly available only for the user which created the string so the password in unavailable for other users. This also means this script has to be run interactively once to create the encrypted password string. Just how secure this solution is, is a matter of discussion but in my opinion it’s better than writing the password in plain text inside the script.

Second part is just to assign the group names to correspond to the license types (SKUs) in the tenant, in this case AzureAD Premium license and O365 E5 license. Then it’s basically a few IF-loops to remove or add licenses to users. Remember the UPN suffix of the onprem-user must match the tenants.

Last thing: This script includes no error handling so if you’re going to put it to use, you should add some sort of error handling with alert (send e-mail, create event in eventlog or similar). Also I’m sure it can be streamlined further but it gets the job done and can easily expand to include several groups with individual license types assigned. Feel free to use this script as a starting point if you want, but at your own risk.


# Get user and UPN from selected group with subgroups
# Assigns location and license in Microsoft cloud
#
# Written by Per-Torben Sørensen
#
# Version: 1.0
#*********************************************************************************************
#
# Change the settings below
#
$sourcegroups = "Cloud_License_AADPremium","Cloud_License_E5" # Name of the groups which controls license assignment
$onlineusername = "cloud_lic_svc@starwarsm16.onmicrosoft.com" # Account which connects to Microsoft cloud and can run this script as a scheduled task
$securefile = "C:\scripts\cloud_lic_svc_securecred.txt" # Encrypted passwordfile for the user.
#*********************************************************************************************
#
# Variables below
#
IF ((test-path $securefile) -eq $false)
{
read-host -assecurestring | convertfrom-securestring | out-file $securefile # Set securestring with password - only need to run interactively once
}
$pass = cat $securefile | convertto-securestring # Building credential
$mycred = new-object -typename System.Management.Automation.PSCredential -argumentlist $onlineusername,$pass # Building credential
#*********************************************************************************************
#
# Logging on to Microsoft Online services
#
Connect-MsolService -Credential $mycred
#
foreach ($sourcegroup in $sourcegroups)
{
$groupname = Get-ADGroup $sourcegroup
$users = Get-ADGroupMember $groupname -Recursive | where {$_.objectClass -like "user"} | Get-ADUser
IF ($groupname.Name -eq "Cloud_License_AADPremium") # Assosiates license to AD group, use Get-MsolAccountSku to find your $sku name
{
$sku = "starwarsm16:AAD_PREMIUM"
}
IF ($groupname.Name -eq "Cloud_License_E5") # Assosiates license to AD group, use Get-MsolAccountSku to find your $sku name
{
$sku = "starwarsm16:ENTERPRISEPREMIUM"
}
#
# Check membership and removes license for non-members
#
$msolusers = Get-MsolUser | ? {$_.Licenses.accountskuid -like $sku}
foreach ($msoluser in $msolusers)
{
IF ($msoluser.LastDirSyncTime -ne $null) # Checks if the user is cloud-only, if so skip to next user
{
$check = Get-ADUser -Filter * -Properties * | ? {$_.userprincipalname -eq $msoluser.UserPrincipalName}
if ($check.memberof -notcontains $groupname) # Check groupmembership and remove license if the user is not a member
{
Set-MsolUserLicense -UserPrincipalName $msoluser.UserPrincipalName -RemoveLicenses $sku
}
}
}
#
# Check group membership and assign location and license
#
foreach ($user in $users)
{
$msoluser = Get-MsolUser -UserPrincipalName $user.UserPrincipalName
IF ($msoluser -ne $null)
{
IF ($msoluser.UsageLocation -ne "NO" ) # Check and set locaion "NO" (Norway)
{
Set-MSOLUser -UserPrincipalName $msoluser.UserPrincipalName -UsageLocation NO
}
IF ($msoluser.Licenses.accountskuid -notcontains $sku) # Check and assign license
{
Set-MsolUserLicense -UserPrincipalName $msoluser.UserPrincipalName -AddLicenses $sku
}
}
}
}

What is Azure Domain Services?

Azure Active Directory (AAD) is, as I’m sure you know, the identity services in Microsoft Azure. Unlike Windows Active Directory (WAD) which has been with us since Windows 2000, AAD doesn’t use Kerberos for authentication since Kerberos isn’t suited for internet traffic and slow/unreliable WAN connection. Obviously the major drawback is that AAD can’t communicate directly with most of our current applications and systems.

To combat this drawback, Microsoft has released Azure Domain Services (currently in preview) which is a feature that allows one AAD to communicate with Kerberos over one virtual network. This is NOT a full version of WAD, it is only AAD made Kerberos-enabled which gives you access to a some of the features from WAD, most of them are read-only however.

This is essentially “domain controller-as-a-service”, so there is no FSMO roles, AD sites, Global Catalog, schema extentions and such to configure or troubleshoot. After deployment you get 2 IP addresses to use as primary and secondary DNS server, which in turn lets you communicate with AAD using Kerberos. This includes joining the domain with you servers and clients. This feature is not to be confused with Windows 10 Azure device join which it something entirely different.

Also I want to remind you that this feature is in preview so things are likely to change from what you can read here.

Implementing Azure Domain Services

Implementing Azure Domain Services is very easy.

  1. Create a group named “AAD DC Administrators” and join the user accounts you want as your admin account to this group. The members won’t be Domain Admins as we are used to from WAD, but this is as close as you get.ads0b
  2. In the Azure portal, find you AAD and under configure you’ll find this setting to enable Azure Domain Servicesads01
  3. When enabled you have to select your domain DNS name and which virtual network this AAD will provide Kerberos over. If this network has a site 2 site VPN, your AAD will be available to resources on-premises.ads2
  4. Notice this message, which says you need password synchronization in order to log on AAD using Kerberos. This also means that Federation is not supported. The procedure is different for cloud accounts and on-prem accounts, but the link in the message describes very well what you need to do, so I’ll just link it here.ads3
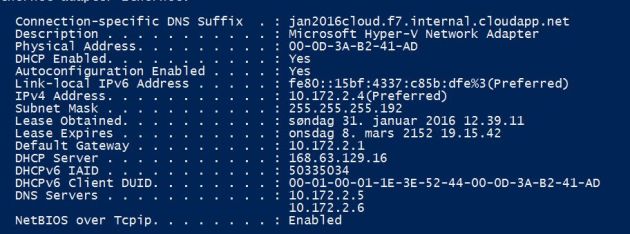
  5. Now you have to wait..a lot. Enabling this takes a long time, about 20-30 minutes. Eventually you’ll get the 2 IP addresses you need to use to reach your domain. You should add both as DNS servers in your virtual network in Azure. It will take some time before the vm’s in Azure are updated so you can either refresh the IP’s or give the servers a reboot.ads5
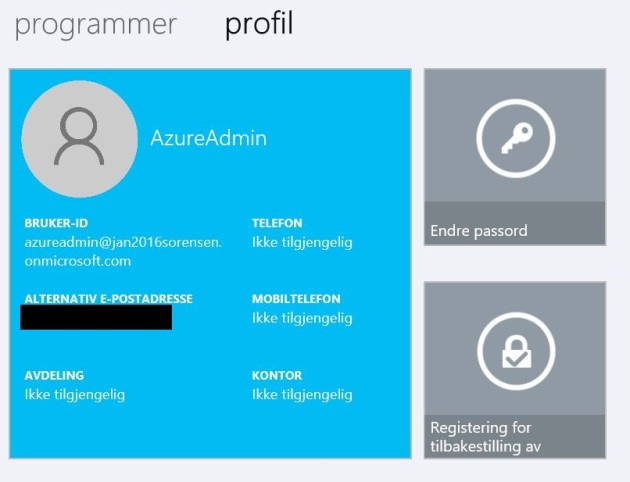
  6. I have a cloud-only user to function as my admin account, so before I can join my servers to the AAD, I have to reset its password to generate the hash (step 4) so I do so at http://myapps.microsoft.com where you find the change password option. (“Endre passord”, sorry this screenshot is in norwegian)ads9
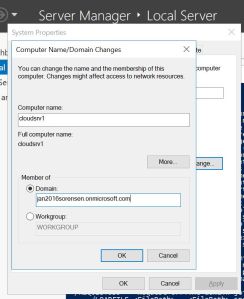
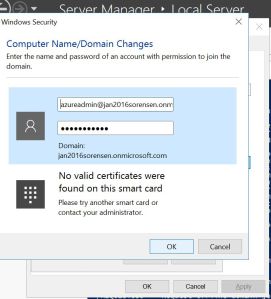
  7. And finally my server has the correct DNS servers and it can join AAD as if it was an ordinary WAD. ads6

ads7

ads8


Taking a closer look at an AAD-joined server

After my server joined my AAD and rebooted it’s available for my AzureAdmin account. So let’s take a closer look on how this works. Starting at the local administrator group on my member server where you see the group we added in step 1 thereby giving me access to the server.

ads_localadmingroup


So naturally I install the RSAT for AD and Group Policy and start to play around.

First of all having a look at FSMO roles:

ads_fsmo


AD sites and services won’t show anything but an error, so nothing to see there.

AD domain and trust just shows us the usual information with no ability to change anything at all.

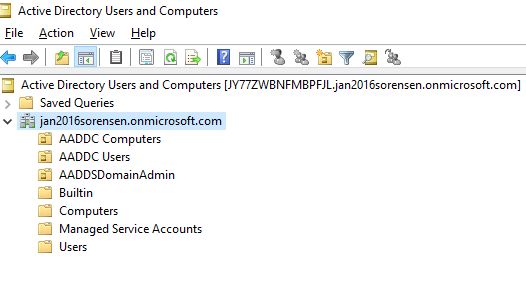
AD users and computers on the other hand is a little more interesting. Here we see the AAD OU structure and we have our users and groups from the Azure portal in “AADDC Users” and our newly joined member server in “AADDC Computers”. This view seem to be completely read-only and nothing can be changed or edited. Note there is no “Domain Controller” container.ads_aduc1


Turns out I can create a new OU on the domain level and in here I can create new groups and users which I can edit. As of now this seem to have no function at all as I can’t authenticate with this new user account and it doesn’t show up in the Azure portal.

ads_aduc2

Group Policy is even more interesting.
ads_gpmc1


There are 4 GPO’s present Default domain and domain controller policy, plus AADDC Computers and AADDS Users (both linked to the OU with the corresponding name).  Those last 2 GPO’s can be edited so you are able to deploy some GPO settings to your domain joined computers and users. You can also change GPO links, enforce, block inheritance and change GPO Staus (disable all users or/and computer settings) However you can’t do any of the following:

  • Create new GPO or delete existing ones
  • Change GPO security filtering
  • Create WMI filters
  • GPO links

ads_gpmc2


DNS: Your account will not have any DNS server rights so trying to connect a DNS console againt the DC will only throw an access denied error.

Add domain controllers: No, you can’t promote an azure vm as an additional Domain Controller 😉

Conclusion

I think Azure Domain Services is a curious thing, while being far from a replacement for you WAD, it does provide the ability to join servers and clients to an AAD and communicate with each other using Kerberos. You can of course use it as if it was a normal WAD, but the management of both users and computer are very limited. Communication using Kerberos is the whole point of this feature and it should open up some new possibilities in both hybrid environments and perhaps also during migration from on-premises to cloud. Another possible application for this feature could be in combination with Azure Remote App.

Again this feature is in preview so I’m sure the re will be changes coming, probably based quite a bit on user feedback.

Enable immediate replication between AD sites

What is immediate replication?

Active Directory has 3 replication models:

  1. Within a site (Intrasite) the domain controllers use Change Notification to alert adjacent dc’s of changes made in AD. By default, after 15 seconds the first replication partner is notified and 3 more seconds to each subsequent replication partner.
  2. Between sites (Intersite) Change Notification is not used. Replication only happens on a schedule with every 15 minutes as the shortest configurable interval.
  3. Account lockout, changes to password policy, DC password changes and a few other situations trigger urgent replication which happens as quickly as the domain controllers are able and bypasses all other replication interval.

The intersite replication can however be configured to use Change Notification and this will bypass the replication schedule of the site link and replication will occur as if the domain controllers were in the same site. This does of course increase the traffic of you WAN link so make sure you have the bandwidth and latency to handle it.

How to enable immediate replication

The procedure is slightly different for automatically and manually changed sitelinks

For automatically created sitelinks:

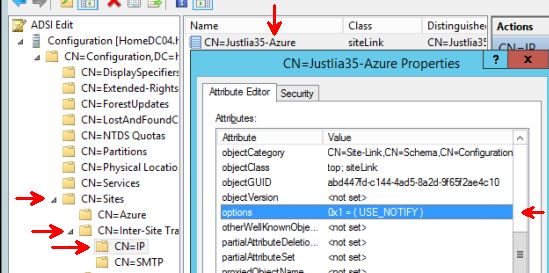
  1. Open ADSIEDIT
  2. Connect to Configuration Naming Context
  3. Expand Sites –> Intersite Transport –> IP
  4. Right-click the relevant sitelink and select properties
  5. Change the value of “options” to 1

wp_intersite_repl1

For manually created sitelinks:

  1. Open ADSIEDIT
  2. Connect to Configuration Naming Context
  3. Expand Sites –> (The site name) –> Servers –> (Servername) –> NTDS Settings
  4. Right-click the relevant sitelink and select properties
  5. Change the value of “options” to 8
  6. Repeat for every manually configured sitelink (if desired)

wp_intersite_repl2

That’s all there is to it. Changes in AD will now flow as if the domain controllers are within the same site.

Deselect “automatically detect settings” in IE using GPP

idefixwiki

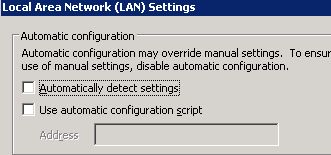
Lately I struggled with finding a way to deselect “automatically detect settings” in IE for all users of a customer.

ADS

There are no GPO settings for this and the GPP IE settings doesn’t allow to set this for any IE versions before IE10 and the customer needs IE9 for compatibility issues with their SharePoint sites.

After much searching I found a way to set this  using GPP to set a registry setting.

  1. Create a new GPO or edit an existing one
  2. Navigate to User configuration – Preferences – Windows Settings – Registry
  3. Create a new registry item with the following values
    1. Name: DefaultConnectionSettings
    2. Action: Update
    3. Hive: HKEY_CURRENT_USER
    4. Path: SoftwareMicrosoftWindowsCurrentVersionInternet SettingsConnections
    5. Value Name: DefaultConnectionSettings
    6. Type: REG_BINARY
    7. Data: (make sure you copy the entire line below, it’s several hundred digits)

460000000B00000001000000000000000000000000000000000000000000000020B9952FC3BBCC0100000000000000000000000002000000170000000000000000000000000000000000000000000001000000001C00000000000000000000000000000000200000002000000010000001000000ED0300000906020008000000000000000000000000000000000000000000000000000000000000000000000000000000FFFFFFFFC0B0EAF9D426D011BBBF00AA006C34E4020000000A000066000000000000000000B55700000000000000000000000000000000000000000000000000000000000000000000000000000000000000000000000000000000000000000000000000000000000000000000000000000000000000000000000000000000000000000000000000000000000000000000000000

It should look like this then

ADS_reg

This will always clear the “Automatically detect settings” on next logon or gpupdate

View original post

Removing mail stuck in retry queue in Exchange

Everyone working with mail has seen this, messages and NDRs stuck in retry queues mostly thanks to spam and malware.

These fine lines of Powershell will remove all messages from retry queues without sending NDR for each message.


# Empty Exchange retry queues without NDR
# Written by Per-Torben Sørensen (per-torben.sorensen@evry.com)
#
# Version: 1.0
#*********************************************************************************************
# Change the settings below
#
$Servers = "CAS01","CAS02" # Enter the name of all CAS servers
#*********************************************************************************************
# Variables below
#
add-pssnapin Microsoft.Exchange.Management.PowerShell.E2010
#*********************************************************************************************
foreach ($server in $servers)
{
$retryqueues = get-queue -Server $server -filter {Status -eq "Retry"}
foreach ($queue in $retryqueues)
{
Get-Message -Queue $queue.identity | Remove-Message -WithNDR $false -Confirm:$false
}
}